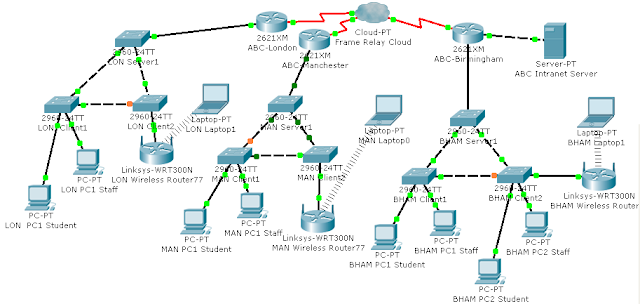
Why
to Use VLAN?
As most of us may know that traditional
network designs use routers to create broadcast domains and limit broadcasts
between multiple subnets. This prevents broadcast floods in larger networks
from consuming resources, or causing unintentional denials of service
unnecessarily. Unfortunately, the traditional network design methodology has
some flaws in design:A switch can have anywhere from 12 ports to 80 or more, and by
default all hosts connected to that switch are going to be in the same
broadcast domain.
For some network services and protocols, a
broadcast received by a host results in that receiving host transmitting a
broadcast of its own. Then when all the hosts receive that broadcast, they all
end up transmitting even more broadcasts. Pretty soon, all these broadcasts
have snowballed into a broadcast storm, which can take up most of a network's
bandwidth and make normal network operations almost impossible. Thus, applying
VLAN is necessary with the following benefits: 1. VLAN can reduce
administration costs associated with moves, adds, and changes; 2. VLAN can control
broadcast activity and provide better network security; 3. VLAN have the
function of leveraging existing investments with flexible and scalable
segmentation
Generally speaking, a VLAN is a logical
local area network (or LAN) that extends beyond a single traditional LAN to a
group of LAN segments, given specific configurations. Because a VLAN is a
logical entity, its creation and configuration is done completely in software.
Therefore, identifiers and configurations
for a VLAN must be properly prepared for it to function as expected. Frame
coloring is the process used to ensure that VLAN members or groups are properly
identified and handled. With frame coloring, packets are given the proper VLAN
ID at their origin so that they may be properly processed as they pass through
the network. The VLAN ID is then used to enable switching and routing engines
to make the appropriate decisions as defined in the VLAN configuration.
 |
| VLAN Configuration |
How
to Configure VLAN?
1. Log in to the Visual Switch Manager for
the switch which you would like to enable VTP.
2. Select “VTP Management” from the “VLAN”
tab of the menu bar.
3. Select the “VTP Configuration” tab. enter
a “Domain Name” and “VTP Password,” and click “OK” to confirm settings. (The
domain name and VTP password must be the same for all switches in the same VTP
domain.)
4. Select “VTP Management” from the “VLAN”
tab. Select the “VLAN Configuration” tab, and click the “New” button that
appears at the bottom of the window.
5. Enter a new VLAN ID and descriptive
name; click “OK” to confirm settings and exit the new VLAN dialog box. Click
the “OK” button a second time to exit the VTP Management page.
6. Select “VLAN Membership” from the “VLAN”
tab. Click on the Assign VLANs tab, and select a port or interface. Choose “ISL
Trunk” or "802.1Q trunk" from the “Mode” drop-down field to configure
the interface as a trunk port to accept traffic for more than one VLAN. (This
will also allow this server to receive VTP messages from other servers on the
network.)
7. Using "ISL Trunk" or
"802.1Q Trunk" will vary based on the model of the switch. Newer
switch models typically use "802.1Q Trunk."
8. Enter the VLAN IDs separated by commas
in the “Assigned VLANs” column. Click “Apply” to confirm settings.
9. Click the “Trunk Configuration” tab, and
then the “Modify” button to change the default settings for the interface or
port. (You can limit the VLANs that send traffic over a trunk line and modify
the list of VLANs that are pruning-eligible. VTP pruning stops unnecessary
traffic for VLANs on trunk ports that are configured as pruning-eligible.)
10. Click "OK" to confirm
settings and exit the VLAN Management window. This will return you to the
Visual Switch Manager home page.
No comments:
Post a Comment